Showing posts with label paint. Show all posts

Thursday, April 2, 2009

We are back at it again!


Giant Orange Room -Attack!
The chair & couch where left behind by the previous owner, those are the only keepers.


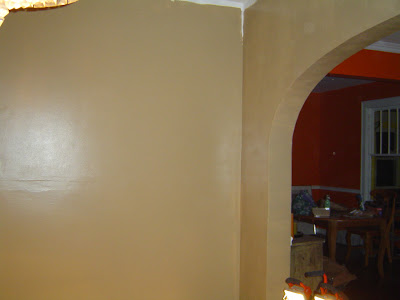
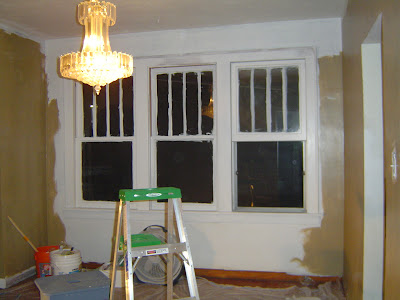
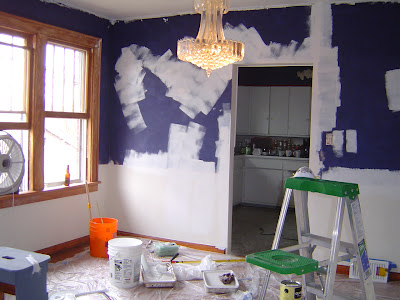
We are back to work on the house and this time it's the largest room in the house. It didn't take us long after we moved into the house to figure out the orange room color just wasn't us. This room has gotten very little attention from me since we moved in. The chair & couch where left behind by the previous owner and I put a cheap table down and a fake plant...I really didn't feel this room at all. So it's time for a change.


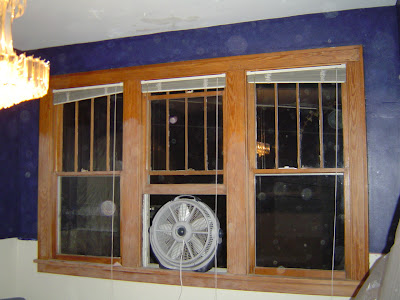
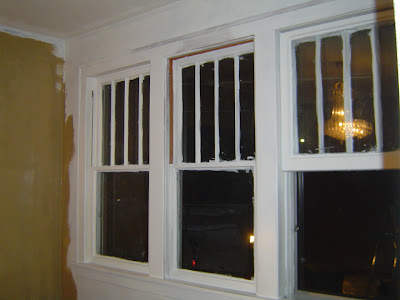
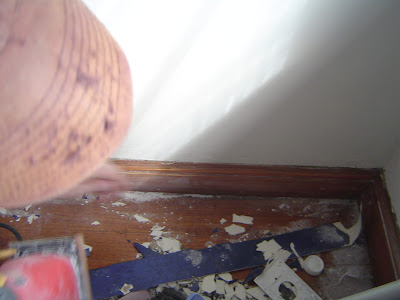
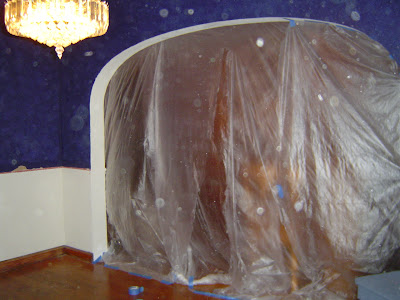
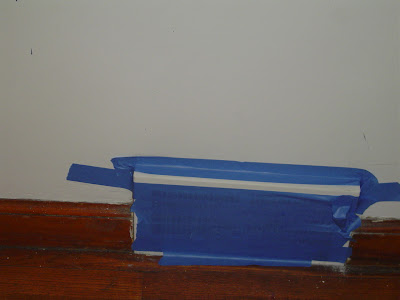
The very flamboyant previous owner was a huge fan of bright colors, in poorly chosen hues. We think he painted in a drug-induced state because he missed sections, and globed on paint in all the wrong spots. Needless to say painting in this house is always fun. First we must assess the damage. Sand down his paint drips and globs. Then super prime the the walls. Priming is always fun because every color he left us takes like 3 coats of primer before we can even begin to paint the real deal. I used to love painting. After all painting a room gives you so much for so little. Thirty dollars and you have a whole new room. A new feeling, a new mood. This room in it's current state gives me the Halloween in March goose-bumps. Just like this poor dog gives me the "Oh my gosh, what did your owner do that for?!?"


Well we have a little prepping to do then we will add another layer of primer. YAY. More on this new project soon.

Wednesday, May 7, 2008

PQI Anyone?

Well the dining room is coming along...I will give you a sneak peak soon, I promise. Several things have set us back in the past few weeks so we are catching up & getting ready for some major projects.

For now I wanted share my new handy online tool through The Rohm and Haas Paint Quality Institute - The PQI Color Designer - You can create paint color schemes for almost any room.
I think it's just fun to play with color anyway possible and this is just one more handy way.

Thursday, April 17, 2008

UPDATE:::Dining Room

The Darn Dining Room is it's new name. We got the paint up and noticed that many of our patches and such where not sanded down quite enough and showed through the paint like giant slabs of plaster screaming at us. So we are trying to over look our poor workmanship and just get the darn thing done. Tomorrow Rob has taken the day off and is going to hang the chair rail, and crown molding with his dad. yippee! So I will hopefully have more to post on the room soon.

My "job" in the dining room project was the beloved double hung windows. Since I was so picky, & bossy...and yes even a little bratty about them I decided that I would tackle them myself so that if they did not turn out it wouldn't be any one's fault but my own.

Removing 100 years of grime & paint off of the original window hardware:

(before)


First:


I took 1/4 cup of *baking soda and added it to a half filled pot of boiling water. Once dissolved I added the hardware and let them simmer for about 30 minutes. *keep an eye on them, if your like me you added more than 1/4 cup and it started to bubble over every time you turned your back. Also I recommend using a less liked pot since you will have all kinds gross stuff floating around in it.


You will begin to see bits & pieces float to the top...


After about 30-40 minutes I took them out and rinsed them, while using steal wool I scrubbed off the loose paint that remained.

After shots coming soon...

Monday, March 31, 2008

The great debate of the lighting fixture. Over the weekend Rob and I shopped for a new dining room light with no luck. We want something that is classic but still has a little eclectic flair. So many lights to choose from...I love them all.


The dining room is "in progress" currently but here is a sneak peak of what we are thinking about:

We are keeping our current table but staining it a dark brown because of this "oops". I love this table so I am willing to work with it. The chairs are going to be sanded and painted white, with a glossy finish. I love the eclectic look of a few different chairs all painted the same color. I want an old hutch that is worn in with time, but for now I think we will use the simple Ikea expedit bookshelf until I find the perfect one.

So let us know your thoughts about the lighting...I am really hoping for some good ideas to move this project forward.


Oh and our old light is for sale HERE on Craigslist St.Louis.

Monday, March 17, 2008


First we had gray/blue, then a green, then we came to an agreed upon color. The wall color we choose is Olympic™ D13-4 Stony Creek in egg shell. It's very earthy and warm, but has a very classy feel to it. It will look just great with the white woodwork and dark stained table with a brand new light...now to finding a light. Any suggestions?


The Dining Room...AHHHH RUN!!!


We decided to tackle the dining room thinking it would be a weekend paint project. Oops. The paint prep on an old house like this takes forever! The picture above is of the floor board that fell off when I started to sand it. yep. some quality walls we have here. So we patched it and nailed a piece of wood between the lath board and the floor board so that it would stay intact. We then patched the wall using
spackling compound with a little bit of water added and sanded it until it look brand new again, well almost anyways. Nothing is perfect when your house in 100+ years old. But that's why we love her so. Right?
(we used the spackling compound because we where going for "quick drying")


After we started chipping out the cracks in the plaster and filling all of the 10,000 nail wholes we had a realization that this was A MUCH LARGER JOB THAN WE THOUGHT. So we kept on chipping, filling, mending & sanding. Lot's of sanding. Like tons of sanding...so thankful I put up plastic in all the door ways to this room and closed off the air vents and shut off the HVAC.

yes those are dust particles taking over my camera lens


not the best way to block off a vent but hey...I try.


I even wore a pretty little mask to protect my dear lungs.

1st place "Handy Tool Award" goes to The Craftsman 9-27984 Professional 1/4 Sheet Pad Sander! You can get yours (
here)

This tool earned it's keep plus some. We used it on the windows, ceiling, floor boards, walls, and the floor. With out a doubt the best sander I have used thus far. The 1/4 sheet allows you use any grade paper you prefer and you just cut it yourself. The handy vacuum bag helped with the dust, but with most any sander you will have access dust flying around. Very easy to use for anyone, and made this job much quicker.

**edit

**Special thanks to my father-in-law John for purchasing the Craftsman Sander and letting us use it. Also a huge thanks to family for chipping in to help us get the walls back in order. Thanks guys!

We got the walls prepped and ready for painting by Sunday around 2:00..yeah great weekend painting project. First we primed the areas where we had spackling, and painted the ceiling with Glidden ICI PAINTS Quick Roll with EZ Track - you can just dip and roll with the easy to use container. It also goes on pink until it drys so you know here you have painted (very helpful). We had to go to Home Depot for this one...our Lowes doesn't seem to carry this gem.


watching the paint dry...


Then we primed the whole wall with 2 coats. We use
Zinsser Bulls Eye primer. We bought a 5 gallon bucket before we painted our bedroom because if you see that orange in the background...it's gonna need a lot.


Next... wall color, new light, chair rails, & crown molding go up.